# Introduction to Conektto
Conektto is a revolutionary platform that simplifies and accelerates API development, enabling businesses to unlock the full potential of their digital ecosystems.
**Welcome to Conektto. - Generative AI for Enterprise API Development at GPTSpeed**
Conektto is the generative platform for Enterprise API development. For enterprises adopting API-First approach, Conektto is the platform of choice enabling businesses to design, built, test and manage APIs as products. Conektto has two products, namely Design Studio and Test Studio.
Conektto Design Studio empowers API teams to design APIs without having to deal with complex JSON or YAML coding. With Conektto, API teams are able to **easily** design APIs in intuitive drag/drop interface, abstracting technical complexity and yet enabling seamless collaboration with the API team including developers, testers, and ops.
Conektto Test Studio is the industry is first API test lifecycle automation product that uses NLP based technology to generate API mocks, tests, test data, test execution suite all from a single source of OpenAPI specification.
## Quick links
{% content-ref url="/pages/7naJ6gLQF01guZqNI5KF" %}
[How Conektto works](/overview/how-conektto-works)
{% endcontent-ref %}
{% content-ref url="/pages/BExVufbvcN7kzcxwecpz" %}
[System Requirements](/overview/system-requirements)
{% endcontent-ref %}
## Get Started
We've put together some helpful guides for you to get setup with our product quickly and easily.
{% content-ref url="/pages/nGVxzfyKPz5Yzur54sjV" %}
[Getting set up](/fundamentals/getting-set-up)
{% endcontent-ref %}
{% content-ref url="/pages/0HPKrOjIv97DFPNj5VRn" %}
[Broken mention](broken://pages/0HPKrOjIv97DFPNj5VRn)
{% endcontent-ref %}
{% content-ref url="/pages/AYvgbhnVJvLC0wpj4xQe" %}
[Broken mention](broken://pages/AYvgbhnVJvLC0wpj4xQe)
{% endcontent-ref %}
# How Conektto works
{% hint style="info" %}
**GitBook tip:** A succinct video overview is a great way to introduce folks to your product. Embed a Loom, Vimeo or YouTube video and you're good to go! We love this video from the fine folks at Loom as a perfect example of a succinct feature overview.
{% endhint %}
## Video overview
Got 2 minutes? Check out a video overview of our product:
{% embed url="" %}
With its advanced GenerativeAI capabilities, Conektto empowers developers and businesses to streamline the process of designing, coding, testing, and managing APIs. Here's a breakdown of how Conektto works:
1. GenerativeAI at the Core: Conektto leverages cutting-edge GenerativeAI technologies, including language models like GPT-4, to automate and optimize API development. This powerful AI foundation allows Conektto to generate code, abstract prompts, and intelligently assist developers in creating robust APIs.
2. Composable Studio: At the heart of Conektto is the Composable Studio, a user-friendly interface that empowers developers to design APIs effortlessly. With a rich set of tools and features, developers can visually create APIs, define data structures, configure endpoints, and set up request/response templates. The Composable Studio abstracts the complexity of API development, allowing developers to focus on the business logic and innovation.
3. Collections for Effortless Testing: Conektto's Collections feature simplifies API testing workflows. Developers can create custom collections and add requests to structure and manage their API testing process. With Conektto's browser-based Collection Studio, developers can easily test APIs running locally, on-premises, in the cloud, or anywhere else. Say goodbye to installation headaches and test your APIs with ease.
4. BYOAI: Bring Your Own AI: Conektto goes beyond just AI integration. With the BYOAI (Bring Your Own AI) approach, businesses can leverage their own AI models and integrate them seamlessly into the Conektto platform. This allows businesses to harness the power of their existing AI assets, enhancing the capabilities of API development and enabling deeper personalization and customization.
5. Integration with Azure OpenAI: Conektto's integration with Azure OpenAI takes API development to new heights. This partnership enables developers to leverage the advanced capabilities of Azure OpenAI's language models, combining the best of Conektto's GenerativeAI platform with the power of Azure's infrastructure. The result is unparalleled productivity, creativity, and accuracy in API development.
In summary, Conektto revolutionizes API development by leveraging the power of GenerativeAI. Through its Composable Studio, Collections, Governance Dashboard, and integration with Azure OpenAI, Conektto simplifies the entire API development lifecycle, from design to testing to management. Developers and businesses can now accelerate their API development, drive innovation, and shape the future of their digital ecosystems with Conektto's transformative platform.
# System Requirements
Here is the outline of system / user desktop software required for working with Conektto and its generated artifacts.
## Conektto.io
[Conektto.io](https://docs.conektto.io/overview/www.conektto.io) and [app.conektto.io](https://app.conektto.io/signin/) are web based SaaS applications that runs on browsers like [Google Chrome](https://chrome.google.com), [Apple Safari](http://apple.com/safari) and [Microsoft Internet Explorer](http://microsoft.com/edge).
## Login / Sign-up
You may use [LinkedIn](https://docs.conektto.io/overview/www.linkedin.com), [GitHub](https://docs.conektto.io/overview/www.github.com) or [Google](https://myaccount.google.com) credentials to login to [app.conektto.io](https://app.conektto.io/signin/). Conektto's enterprise users contact your IT Admin for secure single sign-on access.
## Running API Workspace
You can setup API workspace by downloading your project\_\.zip and follow the steps below:
1. Unzip the files
2. Launch the folder in terminal (Mac/Linux) or command line (Windows)
3. Execute shell or powershell scripts against the offlinedeploy
4. Docker containers for the API workspace will be setup - [Docker DESKTOP](https://www.docker.com/products/docker-desktop/) must be installed before running this setup.
# Create new API
API-led connectivity is a paradigm that allows organizations to connect data, systems, and experiences through the use of APIs. This approach allows for a more flexible and agile integration of different technologies, leading to improved efficiency, scalability, and innovation.
Product managers role and importance of API-led connectivity in today's digital landscape is increasing and product managers are forefront of this change that includes everything from design and test APIs that drive system, process, and experience.
At Conektto, we believe that API-led connectivity is essential for building successful products. Our platform is designed to help product managers easily design and test three types of APIs:
* **System APIs** are the foundation of API-led connectivity, allowing different systems to communicate and share data. Conektto makes it easy to design and test system APIs, ensuring that they are robust and scalable.
* Refere section Free Format API Design and Data Provider API section on how to use Conektto to build your API desgin in minutes.
* **Process APIs** are the glue that binds different systems together, allowing for the creation of automated business processes. Conektto's Aggregate API designer (launching soon) makes designing and testing process APIs easy, ensuring they work seamlessly with other systems and APIs.
* **Experience APIs** are the last mile delivery of data and content for end users based on their specific access channels like mobile app or browsers. Conektto's Experience API designer is in the roadmap for later part of 2023 that will enable Product Managers to look at their product strategy from user / cx lense.
With Conektto, product managers can **easily** design, test and deploy APIs that drive system, process, and experience. API-led connectivity is essential for building successful products, and our platform is designed to make it easy for product managers to take advantage of its benefits. Try Conektto today and experience the power of API-led connectivity for yourself.
# Conektto Design Studio
Conektto Design Studio is revolutionizing the world of API development with its "Build with Metadata" approach. By leveraging metadata, the platform provides a more dynamic, automated, and streamlined way to design, build, test, and debug APIs. Metadata provides context and understanding of the data and enables a more structured design process, allowing for greater automation and efficiency. Conektto's intelligent use of metadata fosters collaboration between developers, designers, and stakeholders, transforming raw data into meaningful insights and actionable endpoints. Embrace the power of metadata with Conektto Design Studio and take your API development to the next level.
API (Application Programming Interface) design is a vital process in software development that dictates how different software components should interact. The way an API is designed can greatly impact the user experience, efficiency, and flexibility of integration. Here are the types of API design you mentioned, explained:
1. [**Free Format API Design**:](/product-guides/create-new-api/free-format-api-design)
* **Description**: This type of design offers the most flexibility, allowing developers to structure the API according to the unique requirements of the application. It doesn't adhere to a specific schema or set of rules, thus providing more creative freedom.
* **Use Cases**: Best suited for prototyping, custom solutions, or scenarios where strict adherence to standards is not necessary.
2. [**Data Provider API**:](/product-guides/create-new-api/data-provider-api-design)
* **Description**: Data Provider APIs are designed to supply data from one application to others, acting as a bridge. They typically follow specific protocols and standards to ensure that data is transmitted accurately and securely.
* **Use Cases**: Ideal for integrating with databases, third-party data sources, or for sharing information between different parts of a system, such as between the frontend and backend.
3. [**Composable Studio / Aggregate API**](/product-guides/create-new-api/composable-studio):
* **Description**: This approach focuses on creating APIs that can be easily combined and rearranged to serve different purposes. Aggregate APIs can gather data and services from different sources and present them in a unified way, making it easier to build complex solutions from existing components.
* **Use Cases**: Suitable for creating modular and scalable systems where components need to be reused across different projects or products.
Each of these design methodologies has its unique strengths and considerations. Choosing the right approach depends on the specific needs of the project, including factors like the intended audience, the nature of the data being handled, the required level of flexibility, and the long-term maintenance considerations.
# Free Format API design
With Conektto, Product Managers can create free format API contracts by simply creating parameters in conektto's intuitive design studio, drag/drop and publish the OpenAPI spec to developers and other stakeholders.
### Create API Project
#### :white\_check\_mark:**Click "Create New API" and Click "Design Studio"**

:white\_check\_mark:**Select "Free Format API design" and provide the title for the API**

### **Create Parameters**
#### :white\_check\_mark:**Start creating your API schema parameters.**

**Click**  **or hit TAB / RETURN to save**
:white\_check\_mark:**Click on** **to edit parameters. Click**  **to save after edit.**

:information\_source:**Support data types**

### Create API Contracts
:white\_check\_mark:**After creating all your requests and response parameters, when you are ready to start creating your RestAPI contracts, start with "Create Resource", "Add Path", and then add "Operations".**

:white\_check\_mark:**Drag/Drop parameters to desired Request as Headers or Form data or Path or Query Parameters or Request Body and Response as Headers or Response Body.**

:information\_source:**Objects, Arrays and Array of Objects allows nesting of parameters inside as illustrated below**
:white\_check\_mark:**Select the appropriate Operation from the response body:**

**Refer to** [**examine schema and simulate payload**](/product-guides/create-api-test#examine-schema-and-simulate-payload)
### **Publish API Design**
:warning:Refer [API Standards and Governance](/product-guides/api-standards-and-governance)section for OpenAPI validations and mandatory contract structure requirements required by Conektto to publish API designs.
Conektto API Standards Validation
:white\_check\_mark:**Click "Publish" to complete and generate OpenAPI contract**

### **Download API Specification**
:white\_check\_mark:**Your API Specification is now available to download in JSON format**

### Modify and Republish
Modify as many times you like by editing the parameters, contracts and .
# Data Provider API Design
Conektto is one of very few platforms that enables product managers to connect their data source and build APIs easily without knowledge of complex JSON or YAML.
Conektto supports most of the commonly used relational database like SQL Server, Postgres and MySQL.
With Conektto's design studio, you can securely connect to your database server hosted on cloud or a VM with external IP, scan schema, order and sequence, make your entities available as drag/drop into the design studio.
Before you design, make sure to:
1. Define the purpose and scope of the API: Determine the specific data or functionality that the API will provide and how it will be used.
2. Identify the data sources: Determine where the data will come from and how it will be collected. Identify host credentials and/or SSL certificates for connecting to the database.
3. Define the API structure and endpoint: Decide on the structure of the API, including the endpoint and the data fields that will be provided.
4. Validate and define business logic: relationships/joins and filter conditions
5. Publish the API documentation: Publish the API design that generates Open API spec, Java Spring boot code, .NET EF code, Apgiee endpoint, API Test workspace, and the ability to push to your GitHub workspace.
6. Test the API: Test the API to ensure that it functions as expected and that the data is accurate.
7. Release the API to the public or specific users: Make the API available for use by the intended audience.
### Create API Project
#### :white\_check\_mark:**Click "Create New API" and Click "Design Studio"**

### Connect Database
#### :white\_check\_mark:Click "Next" to connect your database
Select Database Server Type, and provide host credentials for the desired database under design. You may also choose to connect to your database through SSL. You are required to upload your SSL certificates if you choose to do so. Click "Test" to test the database connection. If you have trouble in connecting the database, check "[Support](broken://pages/61UjZQIiNnPPp8Gi2mXX)" section for additional details.
### Invite Collaborators
#### :white\_check\_mark:Click on "Invite Collaborators"
APIs are no good designed, built or tested in silos. Invite your desired users or stakeholders that you would like to share the API Design project by providing their email id. The respective users will get an email with a link for collaboration.
#### :white\_check\_mark:Click on "Done" to continue with collaborators or "Skip for now" to add collaborators later
#### :white\_check\_mark: Conektto's engine now scans your API schema, your database, runs our patent pending NLP matching process before loading your API test studio designer.
:warning:This process may take several minutes based on the complexity of your schema, database and volume of data.
### Examine your data tables, columns, and all entities
#### :white\_check\_mark: After successful scanning and matching, you will be presented with Design Studio, you will notice all your tables and columns from your database schema available.
:information\_source:You can navigate between tables view and respective columns view by using the navigation as illsutrated : 
 
### Create custom parameters
:white\_check\_mark:Create custom paramters if you would like to define groups for your entities. If your entities are direct attributes, you can drag and drop the enities in the contract designer and start renaming. Refer the [API Standards and Governance](/product-guides/api-standards-and-governance)for supported naming conventions.

Refer[Free Format API design](/product-guides/create-new-api/free-format-api-design#create-parameters)for step by step instructions on how to use the interface for parameter creation.

### Create your API contracts - Rest endpoints, Operations, and payload structure
:white\_check\_mark:**Create Resource & add Path**
Resource is the primary data representation. Having a consistent and robust REST resource naming strategy – will prove one of the best design decisions for consumability, maintenanbility, avoid API sprawl and API lineage.
A **resource can be a singleton or a collection**.
URI = resources + Path
For example, “`accounts`” is a collection resource and “`account`” is a singleton resource (in a customer domain).
Similarly, a singleton resource “`department`” inside the **path** resource “`departments`” can be identified as follows: “`/accounts/{accountId}/departments/{departmentId}`“.\
\
REST APIs use [Uniform Resource Identifiers](https://en.wikipedia.org/wiki/Uniform_Resource_Identifier) (URIs) to address resources. Product Managers and API designers should consider creating URIs that convey a REST API’s resource model to the end users or consumers of the API. When resources are named well, it makes the API intuitive, aligns with product strategy and easy to use.

URI should refer to a resource that is a thing (noun) instead of referring to an action (verb) because nouns have properties that verbs do not have – similarly, resources have attributes. Some examples of a resource are consumers of your API, users of your product, user accounts or account groups, etc.\
\
:warning:Prevent using upper case, underscores, actual CRUD verb, query component, etc.
:thumbsup:Using (-) hyphens improves readability of the resources / URI
#### HTTP Method / Operations
REST APIs enable product managers and API teams to build web applications having all possible CRUD (create, retrieve, update, delete) operations.
[REST guidelines](https://restfulapi.net/rest-architectural-constraints/) suggest using a specific HTTP method on a particular type of call made to the server (though technically it is possible to violate this guideline, yet it is highly discouraged).
:information\_source:GET, PUT, POST, DELETE are some of the most commonly used HTTP operations.
To simplify it:
GET - **to retrieve** data and not for making changes to state
POST - **to create new subordinate resources**, e.g., a file is subordinate to a directory containing it or a row is subordinate to a database table.
PUT - **to update an existing resource (if the resource does not exist, then API may decide to create a new resource or not)**.
DELETE - **to delete a resource** or data from the collections
:white\_check\_mark:Drag and drop desired columns from the table or entire table structure as a group by themselves or under parameter.
:white\_check\_mark:Drag and drop columns or parameters as desired based on your API contract structure.
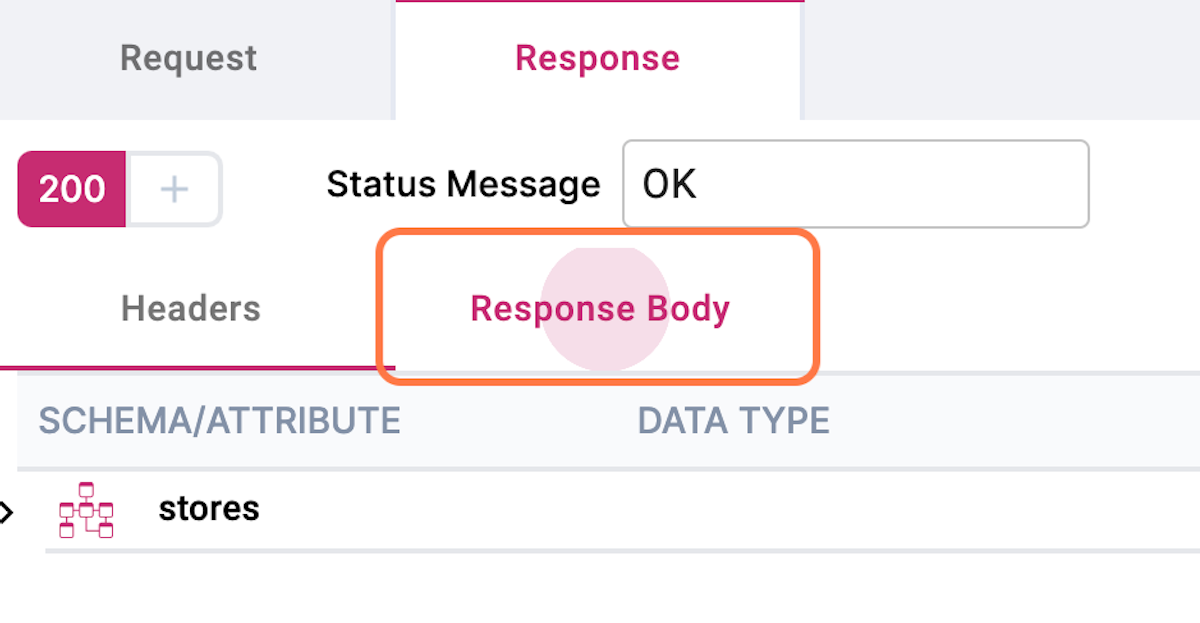
:white\_check\_mark:Click Response tab, drag and drop desired tables or columns in the response body. By default, **200** for success response. If you would like your API to respond with user with proper errors and validations, user status codes like 4xx or 5xx.
:thumbsup:Always use renowned models as guiding principles like Richardson Maturity Model as illustrated [below](https://en.wikipedia.org/wiki/Richardson_Maturity_Model).
### Examine Schema and Simulate payload
:white\_check\_mark:**Visually examine the Schema**
Inspect the operations pre-loaded from the Schema and examine for correctness and completeness of RestAPI operations and contracts.
:white\_check\_mark:**Visually simulate the payload**
:information\_source:Click "SEND" to simulate the request, response payload structure.
### Pre-Publish: Validations and Mapping
After confirming the contracts, click **"Publish"**

Publish action prepares your API contracts, schema and entities selected for validation against OpenAPI standards as well as mapping complex business logic.
### :white\_check\_mark: **Validations**
Conektto assures thorough validation of API standards. The following are various levels of validations if not addressed, your publish would fail:
1. Naming conventions
2. Descriptions, optional and mandatory parameters
3. Correctness of Operations and components
4. Completeness of Operations Status codes
5. Bare minimum structure of a RestAPI contract (Header, Request Body, Response Body)
### :white\_check\_mark: Business logic: Relationship, joins and filters
:warning:Conektto allows users to validate existing entity relationships. Where the database is not normalized, you are able to define custom mapping between the entities. Additionally users can create Filter conditions for the API.
:heavy\_check\_mark:**Derived Entity Maps** - preloaded maps based on database schema scanning
:heavy\_check\_mark:**User Defined Entity Maps** - custom maps defined by user
:heavy\_check\_mark:**Filters** - custom filter conditions annotated by user
:warning:You will be prompted to confirm the database host credentials for final domain model validation.

### :white\_check\_mark:**Completing Publish**
:information\_source:Click "Publish". Conektto will create your Autonomous API Test Harness ready to be downloaded from the Dashboard.
###
###
###
# Composable Studio
With Composable Studio, you can create, manage, and optimize your API workflow code with ease, reducing complexity and boosting productivity and in multiple programming languages.
### Introduction to Composable Studio (Aggregate API designer)
Conektto's Composable Studio is a robust platform that simplifies the process of API integration and design. It empowers developers to build, connect, and orchestrate APIs composable, enabling seamless communication and collaboration between different systems and services.
In this section of the Conektto product documentation, you will discover how to leverage the power of Composable Studio to implement various design patterns in your API integrations. Design patterns are proven solutions to common software design problems, and by understanding and utilizing these patterns, you can enhance the modularity, flexibility, and maintainability of your applications.
This section serves as your guide to exploring different design patterns supported by Composable Studio. Each pattern is explained in detail, providing a clear overview and practical examples of how to implement them using the platform. Whether you are new to design patterns or seeking to deepen your understanding, this documentation will equip you with the knowledge and tools to architect robust and scalable API solutions.
Unlock the potential of Composable Studio and unleash the power of design patterns in your API integrations. Enhance your development process, streamline your workflows, and build robust, modular, and maintainable APIs. Let this documentation be your companion as you delve into the world of design patterns and revolutionize the way you design and integrate APIs.
Get started now and discover how Composable Studio can elevate your API development to new heights.
# Types of Design Patterns supported
#### Types of Design Patterns Supported
**1. Command Pattern:**
The Command pattern allows you to encapsulate requests as objects, enabling you to parameterize clients with different requests, queue or log requests, and support undo operations. For example, a "CreateUserCommand" can encapsulate the request to create a new user, including all the necessary data such as username, email, and password. Here's an example JSON payload for a CreateUserCommand:
{% code overflow="wrap" %}
```json
{ "command": "CreateUser", "username": "john_doe", "email": "john@example.com","password": "p@ssw0rd" }
```
{% endcode %}
**2. Observer Pattern:**
The Observer pattern facilitates communication between objects by establishing a one-to-many relationship, where multiple observers are notified of any state changes in a subject. For example, a "StockPriceSubject" can notify multiple observers when the price of a particular stock changes. Here's an example JSON payload for a StockPriceSubject:
{% code overflow="wrap" %}
```json
{ "subject": "StockPrice", "stock": "AAPL", "price": 150.23 }
```
{% endcode %}
**3. Factory Pattern:**
The Factory pattern provides an interface for creating objects without specifying their concrete classes. It encapsulates the object creation process and allows you to create different instances based on specific requirements. For example, a "ShapeFactory" can create different shapes such as circles, squares, or triangles based on the input specifications. Here's an example JSON payload for creating a Circle using the ShapeFactory:
```json
{ "factory": "ShapeFactory", "type": "Circle", "radius": 5 }
```
**4. Proxy Pattern:**
The Proxy pattern allows you to create a surrogate or placeholder for another object, controlling access to the original object and providing additional functionality. For example, a "ImageProxy" can handle the retrieval and caching of images, ensuring efficient access and reducing network requests. Here's an example JSON payload for retrieving an image using the ImageProxy:
```json
{ "proxy": "ImageProxy", "url": "https://example.com/image.jpg" }
```
**5. Decorator Pattern:**
The Decorator pattern enables you to add behavior to an object dynamically, without modifying its original structure. It allows you to wrap an object with one or more decorators, providing additional functionality or modifying existing behavior. For example, a "TextDecorator" can add formatting options to a plain text document. Here's an example JSON payload for decorating a text document:
**6. Chain of Responsibility Pattern:**
The Chain of Responsibility pattern establishes a chain of processing objects, where each object has the ability to handle a specific type of request. If one object cannot handle the request, it passes it to the next object in the chain. For example, a "PaymentProcessor" chain can handle payment requests, with each processor responsible for a specific payment method. Here's an example JSON payload for processing a payment request:
```json
{ "processor": "PaymentProcessor", "amount": 100, "currency": "USD", "method":"CreditCard" }
```
**7. Template Method Pattern:**
The Template Method pattern defines the skeleton of an algorithm in a base class, with specific steps implemented by derived classes. It allows you to define the overall structure of an algorithm while providing flexibility for customizing certain steps. For example, a "DocumentProcessor" can have a template method for processing different types of documents, with specific steps for parsing, validating, and extracting data. Here's an example JSON payload for processing a document:
```json
{ "processor": "DocumentProcessor", "document": "sample.docx" }
```
**8. Singleton Pattern:**
The Singleton pattern ensures that only one instance of a class exists throughout the application. It provides a global point of access to the instance, allowing other objects to easily interact with it. For example, a "Logger" class can be implemented as a singleton to ensure consistent logging across the application. No example JSON payload is required for this pattern as it focuses on managing the instance creation and access.
These design patterns supported by Composable Studio offer flexible and reusable solutions to common integration challenges, and you can leverage their capabilities by designing and configuring your designs accordingly, consume the AI-generated code and modify as needed.
# Designing Aggregate API in Composable Studio
Conektto Composable Studio offers a powerful and intuitive platform for building aggregate APIs. With its drag-and-drop interface and flexible design capabilities, developers can easily create and manage complex API workflows. This documentation will guide you through the process of building aggregate APIs using Conektto Composable Studio.
**Step 1: Creating a New API**
1. Open the Conektto Composable Studio and click on "New API" in the design studio.
Create API dialog modal
1. Select "Aggregate API" as the API type to begin building your aggregate API.
Selection of Aggregate API feature
**Step 2: Designing Parameters / Attributes**
1. Under the design section, define the parameters and attributes for your API.
Design section
You can specify the required attributes and their data types to structure the API contracts by selecting or by copy/paste of JSON structure.
**Step 3: Creating REST Contract Structure**
Drag and drop the attributes from the design section into the desired contract structure. Define the REST contract structure by arranging and organizing the attributes.
**Step 4: Building the Business Flow**
Go to Business flow do design your composable flow / aggregate API flow. Enable the Composable Studio by clicking on the main card.
Aggregate API flow
Right-click to add cards and choose "API" to add an endpoint info for mapping metadata and controlling the flow.
Add modal
Chain APIs together as needed, either in parallel or sequential order based on the business logic.
Utilize filters, loops, and branches to handle complex logic as required.
**Step 5: Payload Mapping**
Use the payload mapper to map content from the output of one endpoint to the payload of another endpoint.
Payload mapper
Map the content based on your specific requirements, whether it's a full, partial, or custom mapping.
**Step 6: Publishing the API**
Once you have finished building your aggregate API, click on "Publish" to generate the code based on the metadata and mappings.
Overall Aggregate flow
Conektto will generate the code for your API, allowing you to proceed with implementation and testing.
Publish modal
From the Dashboard, against the respective API project, AI-generated artifacts is available for download / consumption or directly commit to your enterprise repository of choice.
**Conclusion:** By following these steps, you can leverage Conektto Composable Studio to build powerful aggregate APIs with ease. The intuitive interface, drag-and-drop functionality, and extensive mapping capabilities enable developers to create complex API workflows without the need for manual coding. Start exploring the possibilities of building aggregate APIs with Conektto Composable Studio and streamline your API development process.
# Collections
Introducing Conektto's Collections: Enhance Your API Testing and Organization
Conektto has a powerful built-in feature to streamline your API testing and organization processes. With our Collections, you can effortlessly test your production-ready APIs 🚀, whether they were created using our studio or already exist in your API ecosystem.
By utilizing our collections, you can create custom collections and add requests, allowing you to easily structure and manage your workflow API testing. It will boost your productivity ⚡️ and ensure a more efficient and seamless testing experience.
Our platform provides a comprehensive environment where you can design APIs using our intuitive studio or incorporate your existing APIs seamlessly. This versatility allows you to leverage your previous work and maximize the potential of your API assets within the Conektto ecosystem 🌐
Simplify your workflow, increase productivity, and harness the full potential of your APIs. Join our community of developers who trust Conektto to elevate their API testing and organization processes to the next level 🙌
Welcome to the Conektto Documentation Portal! We're excited to introduce you to the Collections feature, a powerful tool that will revolutionize your API testing and organization processes. 🚀
### Collections: Effortless API Testing
With Conektto's Collections, you can seamlessly test your production-ready APIs, whether built using our intuitive studio or already existing in your API ecosystem. 💪
🔧 **Create Custom Collections:** Structure and easily manage your API testing workflow by creating custom collections and adding requests. Stay organized and boost your productivity for a more efficient testing experience.
💡 **Versatile Integration:** Leverage the Conektto ecosystem to design new APIs using our studio or seamlessly incorporate your existing APIs. Maximize the potential of your API assets within our comprehensive platform.
⚡️ **No Installation Headaches:** Unlike other popular collections tools, Conektto eliminates the hassle of installation. Say goodbye to outdated software and installation headaches. Enjoy a hassle-free testing experience.
🌍 **Test Anywhere:** Whether your APIs are running locally on your desktop, on-premises, in the cloud, or even on the moon 🚀, Conektto's browser-based collection studio allows you to test them seamlessly.
### Love GPT, Love Conektto 
Join our community of developers who love the power of GPT and trust Conektto to elevate their API testing and organization processes. Simplify your workflow, increase productivity, and unleash the full potential of your APIs with our innovative platform.
Discover the joy of seamless API testing. Sign up now and unlock the true potential of your APIs with Conektto! 🎉
Stay tuned for more exciting features and updates in our Documentation Portal. Happy testing! ✨
## Contents
* [Creating your first collection](#creating-your-first-collection)
* [Creating new requests to collection](#creating-new-request-to-collection)
* [Organizing the collection](#organising-the-collection)
* [Import/Export collection](#import-export-the-collection)
### Creating your first collection
After logging in to our platform, you can see the collections in the dashboard pane.
Landing page
To create a new collection, click **+New** button.
Creating new collection
### Creating new request to collection
To create a new request, click the file icon, which adds the request to the collection.
Adding new request
* Another way to add a new request is by using the **+** button shown in the tab.
Alternate adding request
* Once you click it, the request will get added to the panel and the tab and you can perform your operations.
* After setting your request data or information to get the appropriate response (e.g., adding headers, enabling proxy, specifying the request body), clicking the **send** button will display the response in the response panel.
Sending request data and evaluate Server response
* You can toggle between the requests that are present in the tab.
* You can search for requests using the **search** bar.
* You can copy and duplicate the request you would like to have by clicking the **save** button. Once you get the pop-up modal, there will be a checkbox with the message "Save as duplicate "or "Save a copy."
Saving Duplicate request
* Once you have checked it, you need to click the folder/collection from the structure where you would like to have your duplicate request. Both the request and the newly created duplicate request will have the same content.
Duplicate request added
* **Breadcrumbs** show the path of the request stored under the folder/collection
Breadcrumbs
#### Testing your APIs running on your local desktop
🌐 Conektto's Collections present a handy solution for testing APIs on your local desktop with proxy functionality enabled. With this tool, you can conveniently develop and test APIs within your local environment, streamlining the testing process. 👩💻
🔁 By routing your API requests through a local proxy server, Conektto allows you to capture and analyze traffic effectively. It acts as an intermediary, intercepting and forwarding requests to your local API server. This functionality empowers you to simulate real-world scenarios, troubleshoot issues, and seamlessly validate the behavior of your APIs. 🔄
🚀 Experience the power of Conektto's Collections to enhance your API testing workflow, making it more efficient and productive. Get ready to unlock a whole new level of testing possibilities! 🎯
### Organizing the collection
* If you would like to add any sub-folder(s) or sub-collection(s) to the main folder/collection, click the folder icon, which shows the **Add folder** tooltip.
Adding new folder
* Once request or folder/collection is added, you can rename or delete it using **options** menu.
Options
Options menu
* You can delete the request or folder entirely or delete a single item using the **Delete** option.
### Import/Export the collection
You can export the collection that is created on our platform using the **Export** option in the menu.
Export
The export feature is available for the entire collection that you want to export. It automatically triggers the export function, and the file will be downloaded. You can share this file with your teammates to foster a collaborative work environment.
Export file
Conektto supports the export of **Postman** (version 2.1) files.
Postman export file
Import contents of a API collection from postman file
### Recent History
You can toggle between collections and recent history.
Recent history
Recent history shows the requests that have been opened in the tab, and they are arranged based on the creation of the request, sorted by date.
Recently opened requests
# API Standards and Governance
## API Design Dexterity
Conektto's API design studio has pre-built API standards that enable Product Managers and Developers to focus only on the API schema design while linting is done automatically.
The following are various standards supported by Conektto's design studio:
| | | |
| ------------------ | -------------------------- | ----------------------- |
| Pascal Case | Info-title | Parameters |
| Snake Case | API Description | Attributes / Models |
| Kebab Case | Version | Operations |
| Camel Case | Examples | References / Components |
| Schema Name | Data types | Path |
| Schema description | Standard Data types | Tags |
| | Array and Array of Objects | Required / Optional |
## API Design Governance
Conektto's API design studio has pre-built governance that enable consumability, programmability and operability of APIs. At "Publish", Conektto's API linter scans across the design, flags and validates any non conformance.
| | | |
| -------------------------------------- | ----------------------------------- | -------------------------- |
| Security Scheme | GET, PUT, POST, DELETE, PATCH, HEAD | Success Responses 200, 201 |
| Object relations for Data Provider API | Request and Response structure | Error Responses 4xx, 5xx |
| Path and Query parameters | Header and Form data | No Status codes |
# Create API Test
## Conektto's Autonomous API Test Studio
Upload API specification, connect data store, let Conektto's NLP engine does the magic of attributes to entity mapping, you are now ready to publish and create your API test harness.
## Log in to Conektto
1. Go to [www.conektto.io](http://www.conektto.io). The Conektto page displays.
2. Select **Sign up/Login**.The Conektto **Login/Sign up** page displays.
3. Select **Continue with Linkedin**. The **Linkedin Login** page displays.
4. Enter Email ID and Password, and select **Sign in**. The **Conektto Authenticator** page displays.
5. Select **Allow**. The Conektto API project page displays that allows you to create an API project.
6.
## Create a Test API Project
1. Follow instructions from 1 to 6 in the **Log in to Conektto** section.
2. Select **Test Studio**. The **Test API Project** page displays.
3. Select **Create New API Project**. The **Create API Project** page displays.
4. Enter the **API Name** and select **Upload** to upload the specification file.
5. Select the **Connect Database** tab.
6. Select SQL Server as the **Server Type**.
7. Enter **34.82.24.189** in the **Host** field and **1433** in **Port** field.
8. Enter Username, Password, and Database.
**Note**: Select **Over SSL** checkbox to upload **Key**, **Certificate**, and **CA Certificate.**
9. Select the **Invite Collaborators** tab to enter name of people in the **Invite users to collaborate**.
**Note**: Select skip for now if you do not want to enter any collaborator's name.
10. Select **Next**.
## Video Overview
Check out a video overview of our product below.
{% embed url="" %}
\
Create your API tests
---------------------
\
:white\_check\_mark:From [Conektto ](https://app.conektto.io/signin)dashboard, Click on **"Create New API"**

#### :white\_check\_mark: Click on Test Studio dialog

#### :white\_check\_mark: Type a name for your API Test Project

### Upload Spec
#### :white\_check\_mark:Upload API Specification (JSON)
Upload your desired API Specification for which you would like to build tests.
If you would like to try out our examples, select "Use default BikeStore Spec" and click Next to add collaborators.

### Connect Database
#### :white\_check\_mark:Click Next to connect your database
Select Database Server Type, and provide host credentials for the desired database under test. You may also choose to connect to your database through SSL. You are required to upload your SSL certificates if you choose to do so. Click "Test" to test the database connection. If you have trouble in connecting the database, check "[Support](broken://pages/61UjZQIiNnPPp8Gi2mXX)" section for additional details.
### Invite Collaborators
#### :white\_check\_mark:Click on "Invite Collaborators"
APIs are no good designed, built or tested in silos. Invite your desired users or stakeholders that you would like to share the API test project by providing their email id. The respective users will get an email with a link for collaboration.
#### :white\_check\_mark:Click on "Done" to continue with collaborators or "Skip for now" to add collaborators later
#### :white\_check\_mark: Conektto's engine now scans your API schema, your database, runs our patent pending NLP matching process before loading your API test studio designer.
:warning:This process may take several minutes based on the complexity of your schema, database and volume of data.
#### :white\_check\_mark: After successful scanning and matching, you will be presented with Test Studio with all your schema resources pre-loaded with RestAPI contracts as well as established matches as Full Match, Partial Match or No Match
How Conektto's matching logic works?
**Conektto scans:**
:information\_source: API schema attributes, data types, components, paths and operations
:information\_source:Database schema, entities, relationship, order and sequence as well as samples data
**Conektto NLP based matcher:**
:information\_source:Extracts the natural language from the scanned information, matches that based on the meta data components like data type, pattern, descriptive information as well as use language / dictionary library to find meaning and relevancy
:information\_source:When able to establish a match, provides a FULL MATCH with actual matched entity (table and column).
:information\_source:When partially able to establish a match with one or many, provides a PARTIAL MATCH along with entity recommendations
:information\_source:When inconclusive, marks as NO MATCH
**User override**
:information\_source:Users can override Conektto recommended match by custom selection of entities.
:information\_source:Select the schema and respective attribute. Click on the Full,Partial or No Match icon to examine the actual match or override as desired.
  
### Examine Schema and Simulate payload
:white\_check\_mark:**Visually examine the Schema**
Inspect the operations pre-loaded from the Schema and examine for correctness and completeness of RestAPI operations and contracts.
:white\_check\_mark:**Visually simulate the payload**
:information\_source:Click "SEND" to simulate the request, response payload structure.
### Pre-Publish: Validations and Mapping
After confirming the contracts, click **"Publish"**

Publish action prepares your API contracts, schema and entities selected for validation against OpenAPI standards as well as mapping complex business logic.
### :white\_check\_mark: **Validations**
Conektto assures thorough validation of API standards. The following are various levels of validations if not addressed, your publish would fail:
1. Naming conventions
2. Descriptions, optional and mandatory parameters
3. Correctness of Operations and components
4. Completeness of Operations Status codes
5. Bare minimum structure of a RestAPI contract (Header, Request Body, Response Body)
### :octagonal\_sign:**Mandatory mappings**
:information\_source:For Conektto to publish API test artifacts, schema attributes are required to be mapped with database entities. You will be prompted with below mandatory mapping steps:
:warning:Select appropriate attributes and respective entities to be mapped. Click **"Save and Publish"**
### :white\_check\_mark: Business logic: Relationship, joins and filters
:warning:Conektto allows users to validate existing entity relationships. Where the database is not normalized, you are able to define custom mapping between the entities. Additionally users can create Filter conditions for the API.
:heavy\_check\_mark:**Derived Entity Maps** - preloaded maps based on database schema scanning
:heavy\_check\_mark:**User Defined Entity Maps** - custom maps defined by user
:heavy\_check\_mark:**Filters** - custom filter conditions annotated by user
:warning:You will be prompted to confirm the database host credentials for final domain model validation.

### :white\_check\_mark:**Completing Publish**
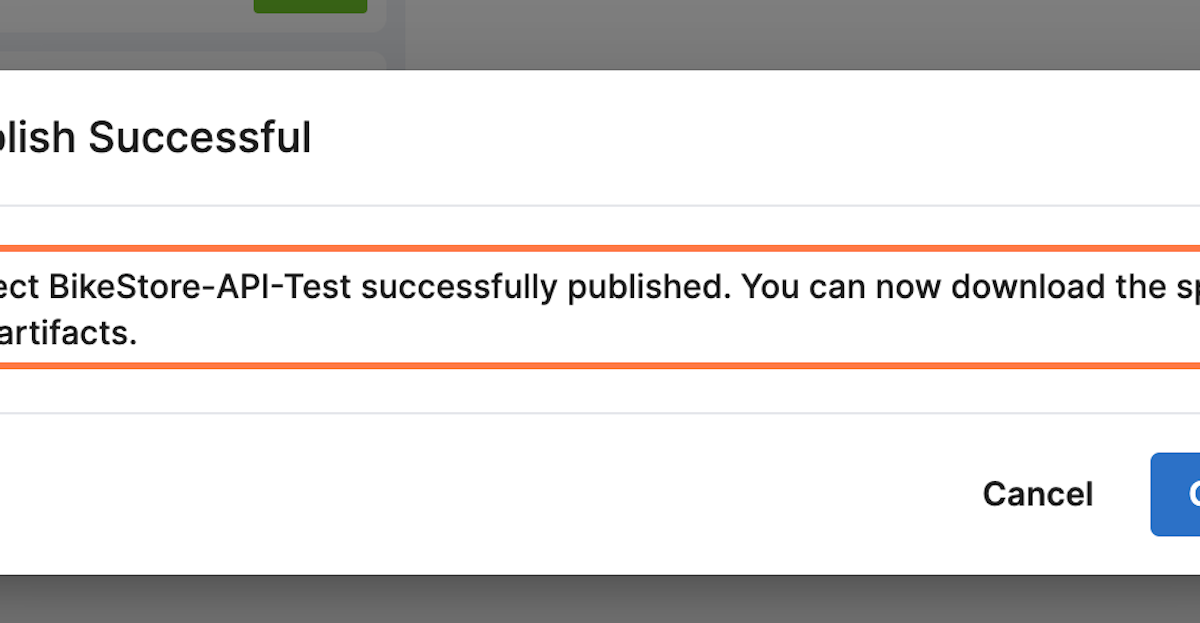
:information\_source:Click "Publish". Conektto will create your Autonomous API Test Harness ready to be downloaded from the Dashboard.
####
####
# Execute API Test
Conektto's Autonomous API Test Studio uses NLP technology to analyze and create test harness for executing all your tests. Before you continue on this section, make sure you read the previous section.
## Setting up Conektto API Test Workspace
After successfully publishing your API test project, you can download the API workspace from Conektto's Dashboard as illustrated below.
Click "API Workspace" to Download from the Conektto Dashboard
## API Test workspace
Conektto's API Test Workspace works locally on your desktop or on a VM or cloud instance. The test workspace is composed of set of docker containers
ReactUI - To interact and perform test execution
NodeJS - API backend to interact with ReactUI and backedn MongoDB
MongoDB - Backend database to store test workspace data
FlaskAPI - For data retrieval from MongoDB to enable test data insertion and to persist test results
Mock services - To run mock runners for the API under test
Test Runner engine - To run functional API tests and analyze results
Grafana UI - Pre-built Grafana Dashboard to visualize performance test results
InfluxDB - Time series database for persisting performance test data
## Download and Install API Test Workspace
#### :white\_check\_mark:Unzip the downloaded contents and run docker setup scripts
Downloadable API Workspace is named with "Proj" prefix followed by name of your API project: as in "Proj\_Demo\_DocAPItest.zip"
Unzip the contents and open the contained folder in Terminal or Command line

MacOS users // sh offlinedeploym.sh
Linux users // sh offlinedeploy.sh
Windows users // run offlinedeploy.ps1
:warning:Check the system requirements section for Docker Desktop requirements

:octagonal\_sign:When you are setting up the API workspace first time, it could take several minutes. After successful install, the future setup takes only few minutes.
:white\_check\_mark:Watch for Terminal or Powershell CMD prompt messages confirming successful completion of the setup process.

:white\_check\_mark:Confirm the installation by manually inspecting your Docker Desktop

:fireworks:Congratulations on successful setup. Examine if your API workspace setup is correct by launching API workspace on your browser

## Working with your API Test projects on
:white\_check\_mark:Select the API test projects that is now setup locally as test workspace.

### Understanding API Test workspace
For each API test project designed and published in Conektto, you can see following features:
:heavy\_check\_mark:**Visualize** - Conektto's 0.1 version of API visualization from a schema perspective
:heavy\_check\_mark:**Virtualize** / mock - Mock endpoints consumable locally or VM or cloud
:heavy\_check\_mark:**Test Data** - Test data generated for functional and performance tests that are automatically associated with tests once completed insertion back to your database. You can generate more data as needed
:heavy\_check\_mark:**Tests** - Functional and Performance test case and execution platform auto generated by Conektto
:heavy\_check\_mark:**Test Results** - Test results viewer to analyze test execution results

### Visualize API
Visualize your API Schema
###
### Virtualize / Mock API endpoints
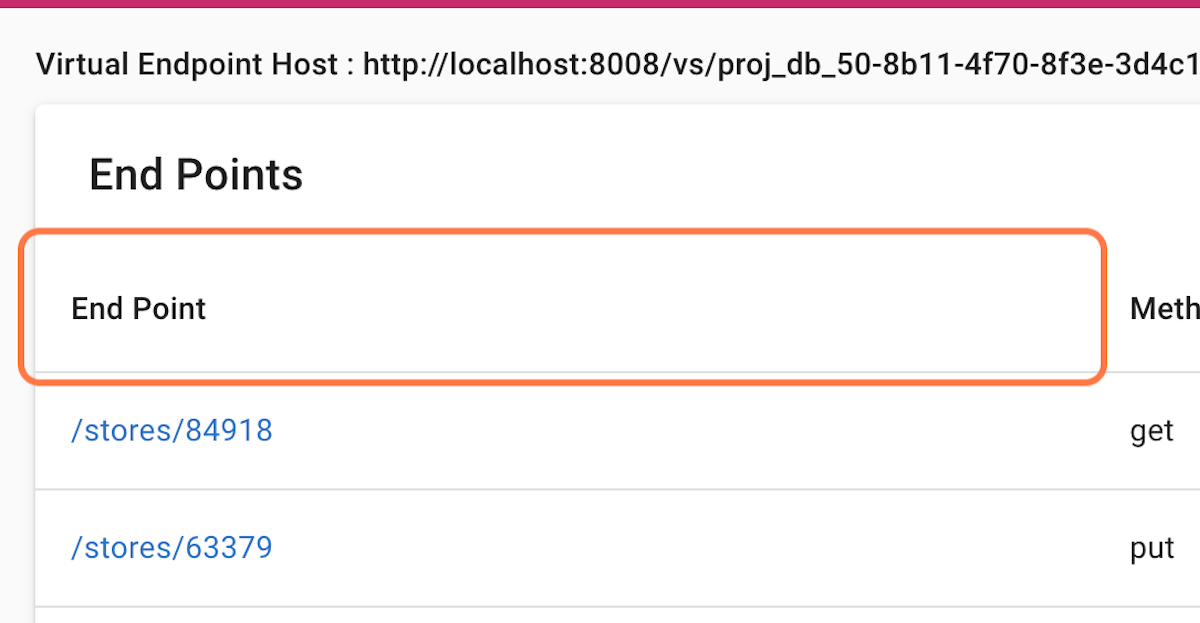
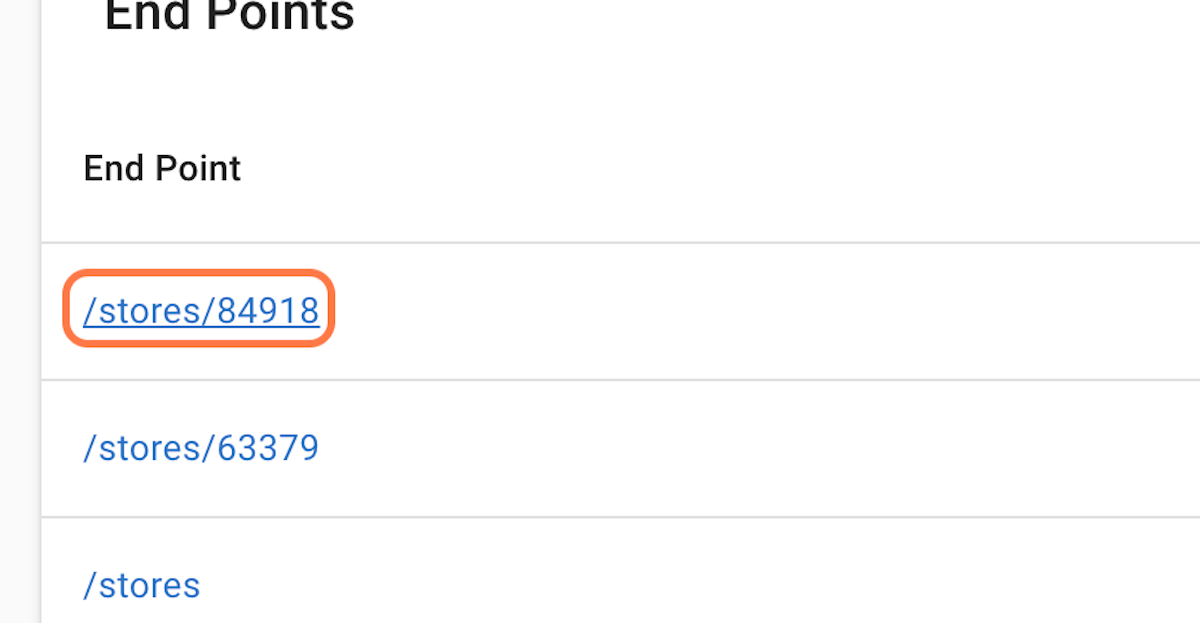
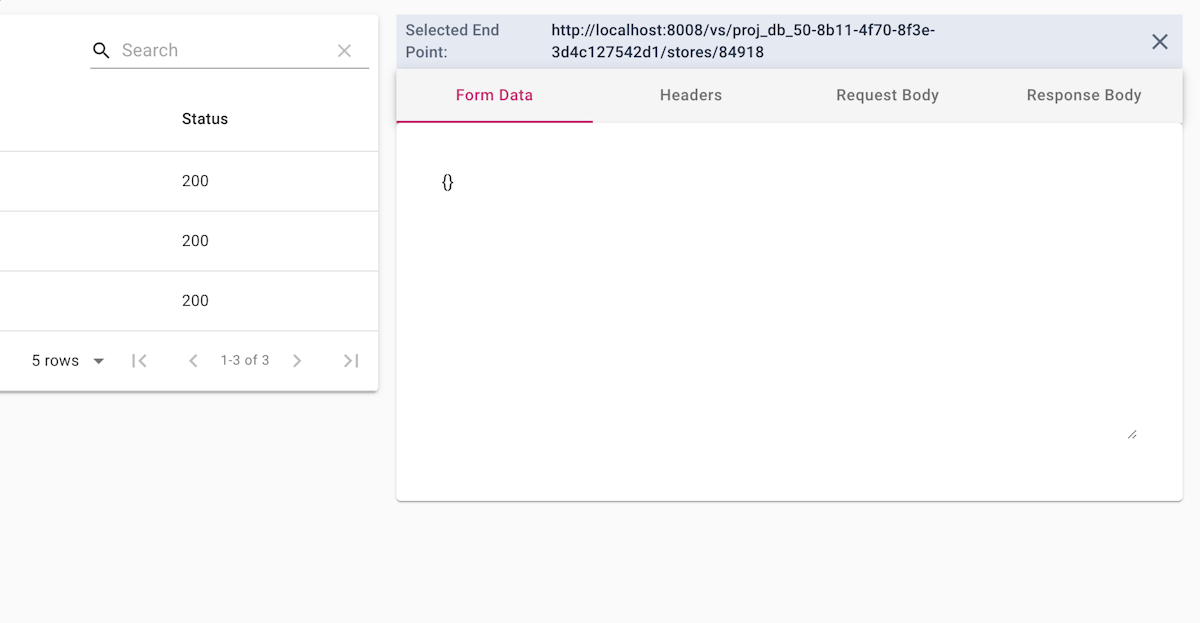
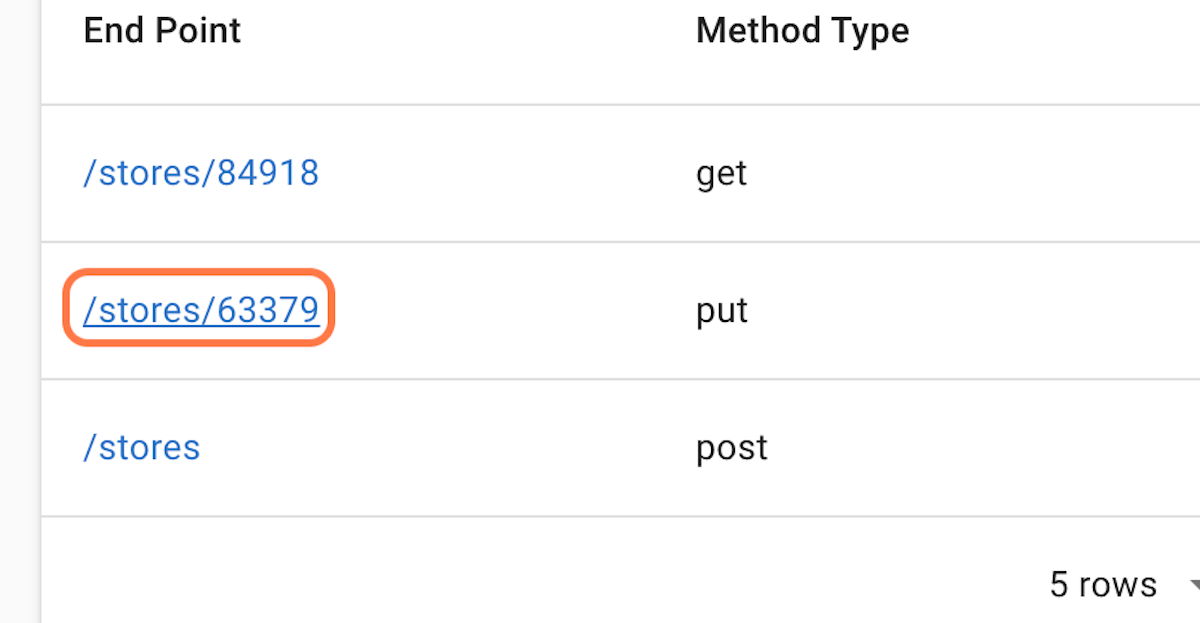
The mock endpoints for the API under test is deployed locally in port 8008. The mock can be hosted on VM or cloud as well.

:information\_source:Click on Virtual Endpoint Host :
### Test Data
Conektto generates all Test Data for your entire database despite your API under test is only related to few entities. The test data is generated with unique patent pending algorithm that ensure entity relationship, order, sequence and overall integrity of the database and ready to be inserted into your database.
:information\_source:The test data is generated for Functional and Performance tests. Once data is inserted, the data is automatically associated with auto generated tests for Test Execution.
Test Data generator for API
:white\_check\_mark:Click on INSERT to insert test data into your database and provide host credentials.
:octagonal\_sign:Conektto recommends you do not use your production database for insertion as this could impact on your existing live customer data sets.

:white\_check\_mark:Click on GENERATE MORE DATA if your existing test data is exhausted after insertion and test execution.
:information\_source:Generate request has limitations with your subscriptions. Check [Conektto License Model](/fundamentals/conektto-license-model) for additional details.
:warning:Generate button will be disabled until successful execution of tests for previosuly inserted test data.

:white\_check\_mark:Click on **Performance** link to view the test data generated for Performance Tests.


:information\_source:Below is the illustration of test data generation feature. This will be enabled only when all test data are exhausted. For download and setup instructions of generated test data, refer [#download-and-install-api-test-workspace](#download-and-install-api-test-workspace "mention").

### Tests (API Test Cases and Test Execution)
Conektto auto generates all API test cases and test execution engine for functional and performance. The functional tests can be executed against mock or real endpoint.
### Functional API Tests

:information\_source:Test cases generated by Conektto covers: all status codes in the API contract, mandatory and optional parameters, schema validation and data validation. Click on the Test Case Name to review the full payload including assertion details.

:white\_check\_mark:Click "Full Payload" to see the assertion details for each of the tests.


### Run API Tests
:white\_check\_mark:Click "Run Tests" to execute all the tests for the respective API test project.

### Tests Executing
:white\_check\_mark:You can see the progress of the tests as they execute.

### Test Execution Results
:white\_check\_mark:View test execution results in the "Test Results" tab

### Test Result History
:white\_check\_mark:Test execution resutls displayed as summary, detailed as well as visual representation of your API endpoints.


### Performance Tests
:information\_source:Conektto auto generates performance tests along with the test data for respective volume that are executed locally on the docker containers. Select the type of the performance tests from the drop down:
:heavy\_check\_mark:Baseline: Basic benchmark tests with low volume, shorter duration and slower ramp-up
:heavy\_check\_mark:Load - Lower volume, shorter duration but faster ramp-up threads
:heavy\_check\_mark:Stress - Higher volume and longer duration of threads
:heavy\_check\_mark:Endurance - Lower volume and longer duration of threads

### Grafana visualization
Conektto's performance test executions are persisted in InfluxDB container and can be visualized for relevant performance metrics in the Grafana plug-in.
:white\_check\_mark:Launch Grafana container from [https://localhost:3004](http://localhost:3004/d/924c4550-8a39-42d9-8189-564e04109b4b/perf_metrics_dashboard?orgId=1) with default Grafana user name as ***admin*** and password as **admin\@123**

Contact [Conektto](mailto:engage@conektto.io) for testing high volume performance scenarios on Kubernetes Cluster which is currently only for a Enterprise users.
# Getting set up
:white\_check\_mark:Setting up of Conektto from building your APIs done in few minutes. From the Login / Sign-up link, you can use any of the 3 social authentication tools like LinkedIn, GitHub or Google to sign in so you do not have to use and remember yet another user id and password.
:warning:Continue with SSO (Single Sign On) is enabled only for enterprise users. If you are not sure about it, contact your IT helpdesk to check if your enterpise is partnered with Conektto for SSO based login.
:information\_source:Check [System Requirements section](/overview/system-requirements) to know the tools and apps required for using Conektto and running Conektto generated API Test Workspace on your desktop.
# Conektto License Model
Refer to Conektto's pricing plan inside the app as well as not he website for latest information.
:tada:Conektto's plans and features are illustrated below, although subject to change at renewal.